Showing posts with label handmade vintage dictionary flowers. Show all posts

Friday, April 8, 2011

Blank Canvas.....

Dear Art Teacher;

No, my canvas is not empty, I was painting with all the colors of the wind.

Sincerely, Pocahontas*


Do you ever have a week where it feels like you've haven't accomplished anything? You've been super busy though?! That's how I've been feeling. While I couldn't finish a project this week if my life had depended on it...a lot got done....just not a lot of crafty stuff. I did made these...okay...last week....

In my never ending need and desire to be more "Green" and to be more efficient and organized {will I EVER get there??????} I made these beautiful posies using scrap paper scraps and my vintage dictionary embellishments that I have in my etsy store...they make me happy.

They are fun to make too....here's how:
Simply punch out various sizes of scrapbook paper, distress the edges of each circle. Paint glue on various places on the edges of each circle and generously pour glitter over glue. Once dry, put some glue in the centers and stack circles on top of each other. Top with my little vintage dictionary embellishments or whatever you have on hand for a fun center! Easy, cute embellishment that works with your scrap paper scraps!! {Love} Have fun making them and just in case you don't want to make any but would like some....I'll put a couple sets in my shop soon!!

So, next week will be more productive....next week wont be a blank canvas...next week I need to get some Easter Treats ready!!! I can't wait!!

After tomorrows' soccer game {providing it doesn't rain or hail again!} my weekend is pretty quiet and I'm so looking forward to that! I do hope to rent some movies and eat some buttery popcorn...My Girls and I got Art Journals this week so there may be some painting going on....What are your plans????

Have a great weekend,


*P.S. I read that on the Dear Blank website. Made me laugh for sure!! Some of them are completely hysterical and others...well, not so much {Really, not at all funny!}. So read it at your own risk and don't blame me if you are offended by some of them, I didn't make them up...not one of them! {Just Saying!}

Friday, September 10, 2010

{ Ribbon Love }

I love the look of this pile of hand dyed ribbon in fun Halloween colors. Since, I needed some cool ribbon for a treat I'm working and couldn't find just what I was looking for in my stash...I decided to make some! Love these colors and this ribbon is so fun to play with!! I threw some in my etsy store too....just for you!!! You can also dye your own ribbon...matching colors perfectly to your project.....I showed you how to here.

I can't wait to show you the treats....you'll have to wait and see till next week though....they are not quite ready!!
All this Halloween stuff is definitely making me fell "fallish". The last couple of days the weather has been chilly so today I made a huge pot of chili which is cooking in the crock pot..unfortunately {or not}..today is turning out to be a warm sunny day! I bought things to make pumpkin apple muffins too! {Yum} I love the cooler weather!
What are you working on? Are you in Fall mode yet?
I'm still gathering some things for a fun little giveaway too....so stayed tuned!!
Thank you to everyone who has left comments lately! They make me very Happy! I love to read your thoughts and feedback!
{Hugs}

Thursday, April 8, 2010

Tin Transformation!

I did this tutorial for the P K Glitz blog and thought I'd share it here too!!

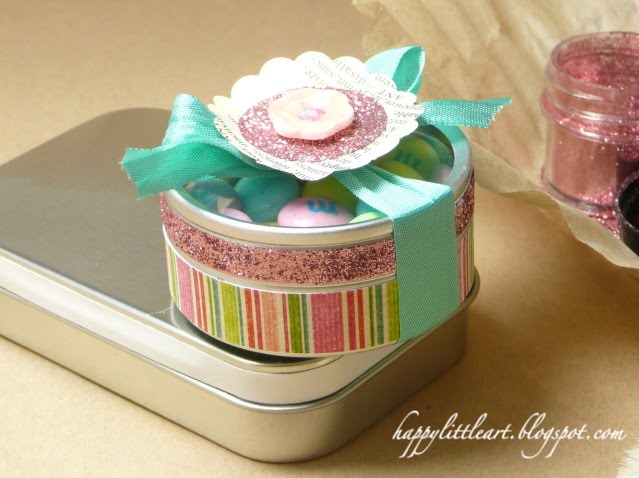
We've all had something that came in a little tin, mints, buttons, ect., don't throw away those tins, reuse them but make them prettier!! (You can also buy brand new tins online or I've seen them at Michaels) Today I'm using a small round tin.

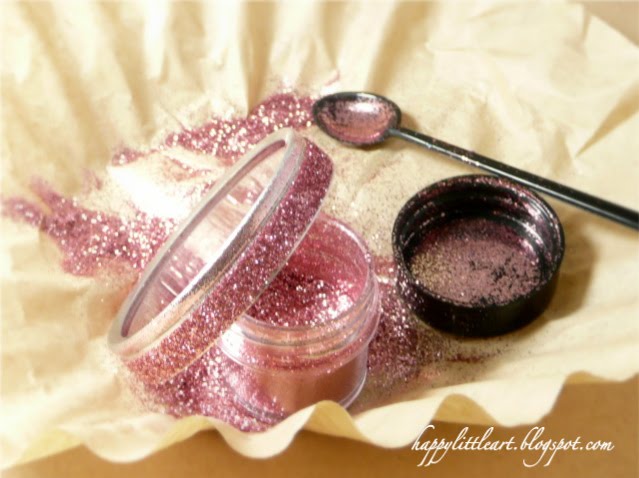
First gather up your supplies: Glitter, Sticky tape, I'm using 1/4" (both of those items you can get at P K Glitz!) =:O). Tin, scrapbook paper, ribbon and small embellishment.

Run the sticky tape along the outside rim of the top lid going all the way around and peel away the protective layer.

Glitter up the sticky tape by pouring generous amounts of glitter on it. Brush off any excess glitter to save.

Next you'll want to cut a piece of scrapbook paper to fit the bottom side of the tin and run all the way around. Apply it to the tin using the sticky tape.

Now you're almost done! Fill the tin with a little treat (I used M&M's) or somethin' somethin' and tie a pretty ribbon around it. Add a little embellishment on top, I used my vintage dictionary buttons found here but you can use a tag, a flower, whatever suits you and viola...an adorable little treat tin, perfect for a million reasons!!

Here is another view!

Fun Huh?! I would love to see any tins you decorate!!!!
The Kids are going to be tie-dying some shirts today and hopefully we will then head off to the park for some swinging....Hope your day is fabulous!!
Hugs,

Tuesday, April 6, 2010

Thank You and a Winner!!

Wow! What a great Blog Hop! I hope you all had fun!! I just wanted to say Thank You to everyone who stopped by my blog and left such Wonderful comments! I appreciate the nice thoughts!!! So....Thank You!!

I loved making this card...I punched out a little hole a popped one of these vintage dictionary buttons into the space....I think it turned out so cute! Oh...you don't want to talk about the card today? You want to see who won! Well Okay.....The person that won a set of my embellishments is:

Ruth,
who said: "beautiful flowers, I so love using the old vintage printed pages
and glitter is like my favorite...."
Ruth! Please sent me your address so I can get these out to you!!

If I don't hear from Ruth by Wednesday, I will pick another winner! I hope you all had a great Easter weekend...its spring break around here so the Kiddos are home...so I need to find something fun to do with them.....Any fun thoughts?
Have a Great Week!!
Hugs,
Related Posts with Thumbnails